Learn to do GST registration online As per GST rules, it is mandatory for a business that has a turnover above Rs. 40 lakh to register as a general taxable institution. This is known as the GST registration process. Turnover is Rs 10 lakh for businesses located in hilly states and northeastern states. The registration process can be completed within 6 working days.
What is GST?
If you have come here till then you will know what is GST? But if you know nahi, then tell you that the full form of GST is Goods and Service Tax, GST is considered to be India’s most awaited tax reform. It is an indirect tax reform that removes the tax limit between states and creates a single market. Under GST, only value addition will be taxed and the tax burden will be borne by the end consumer.
How to do online GST registration
Follow the steps given below to do online GST registration and know how to register GST.
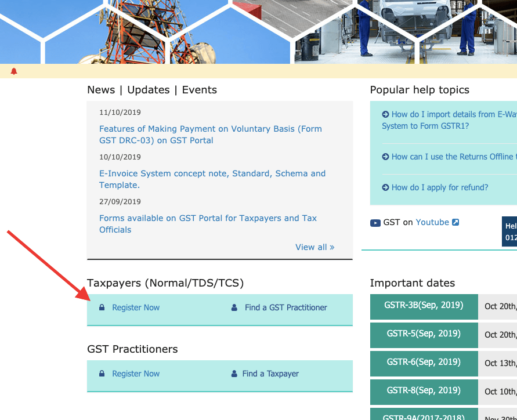
Step 1- First of all, you have to go to the GST portal, and click on the link under Register Now under Taxpayers (Normal).
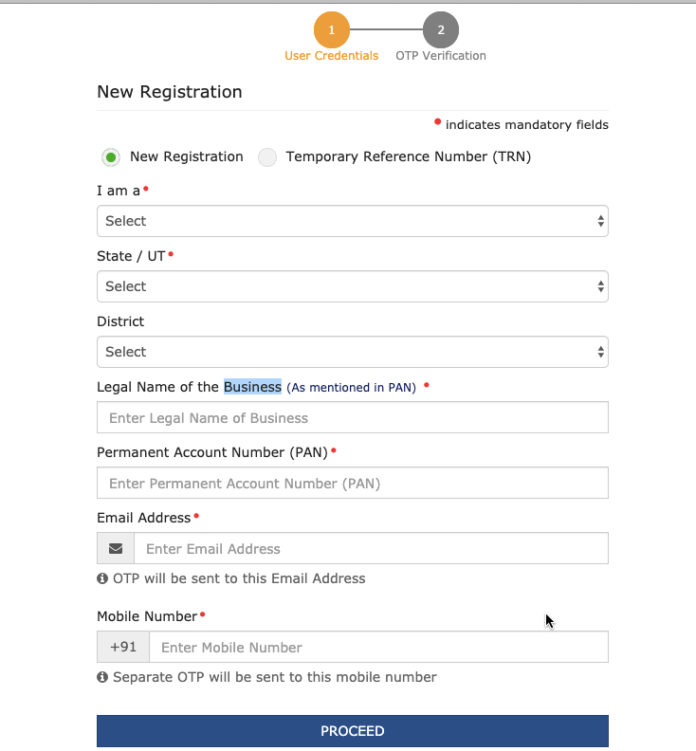
Step 2– Now you have to fill the following things in the given form
- First of all, then the registration has to be selected.
- Now you have to select the option containing Taxpayer in the drop-down menu in all the previous options.
- Now you have to select your state and district.
- Now you will have to write the name of your business as written in your PAN card, and then type your PAN number below.
- Now you have to enter your Email ID and Mobile Number, and if you enter the Mobile Number and Email ID, then OTP will also come in it, which you will need further.
- After filling all the information you have to click in the Proceed button.
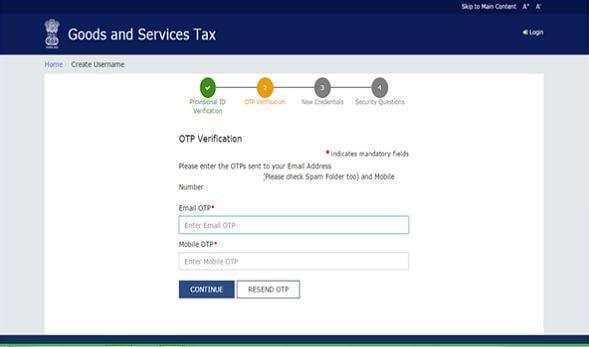
Step 3- Now OTP will come in your email ID and mobile number, you have to enter it, after entering OTP, click in the Continue button, if you have not received OTP, then click in the Resend OTP button.
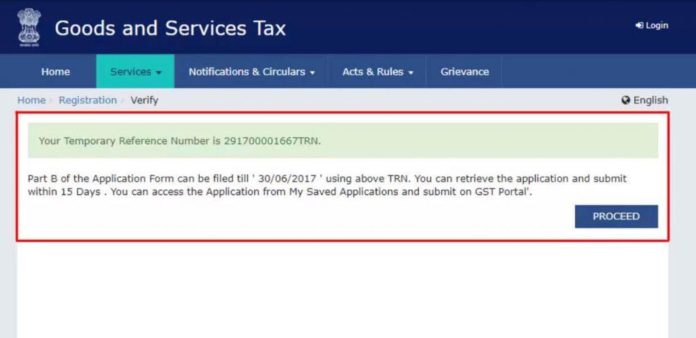
Step 4– Now you will get the Temporary Reference Number (TRN), and you will get this number on the message on your email account and mobile number as well, note it well, it will work later.
Step 5- Now you have to go to the GST portal again and click again in the Register Now button.
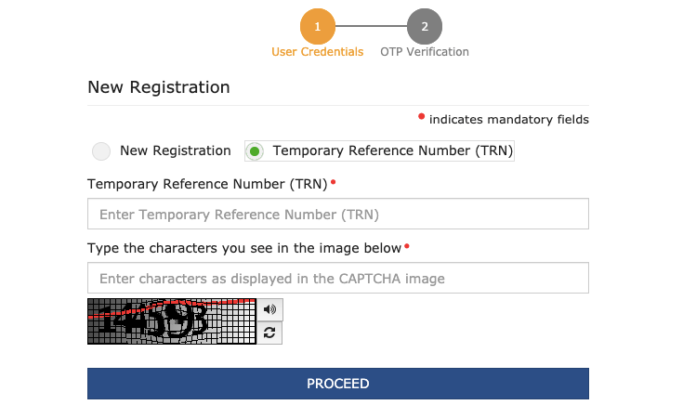
Step 6- Now you have to enter your TRN number in the option of Temporary Reference Number (TRN) and enter the captcha and click in the Proceed button.
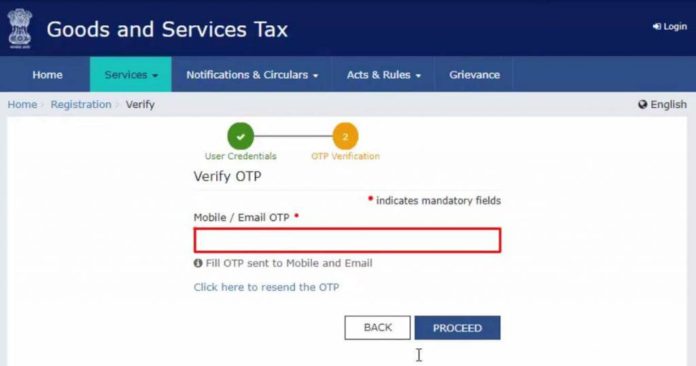
Step 7- Now you will get OTP on your registered mobile number, enter it and click in the Proceed button.
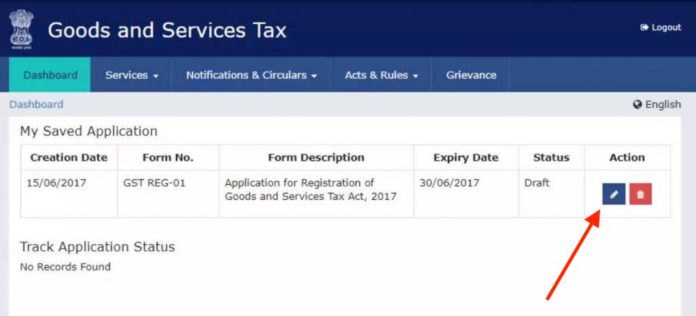
Step 8- Now you will see the status of your application, where on the right side you will see an edited icon, click in it.
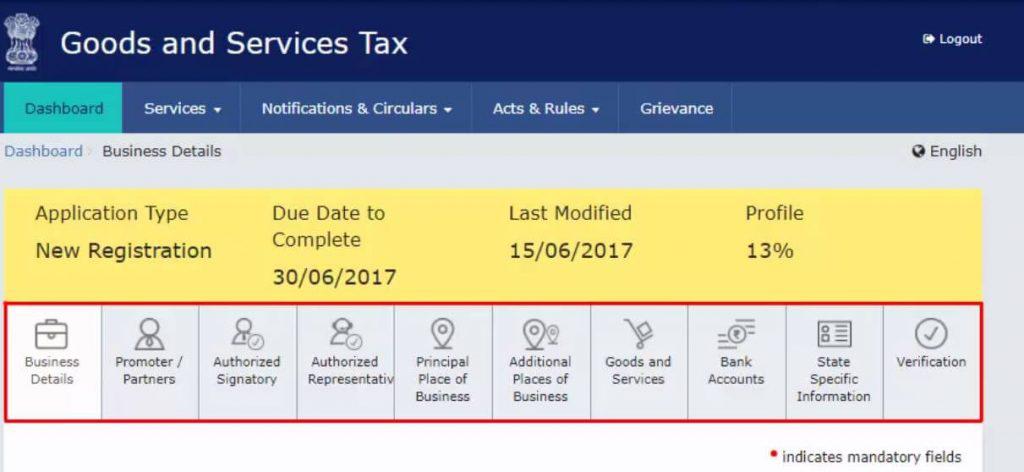
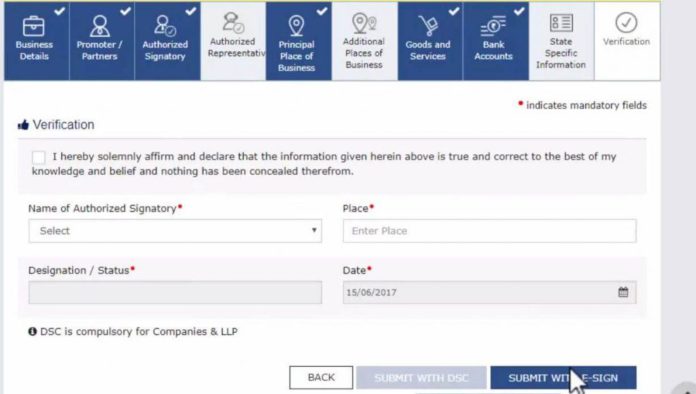
Step 9- Now you will have 10 new sections open in front of you as shown in the Digi image below, now you have to fill your information in all the requested documents, the documents that you will need are as follows-
- Photo
- Constitution of the taxpayer
- Proof of place of business
- Bank account statement
- Authorization form
Step 10- When all your information is filled correctly, then go to the page with Verification and ticking in the declaration option, click in the button with EVC or e-sign and proceed.
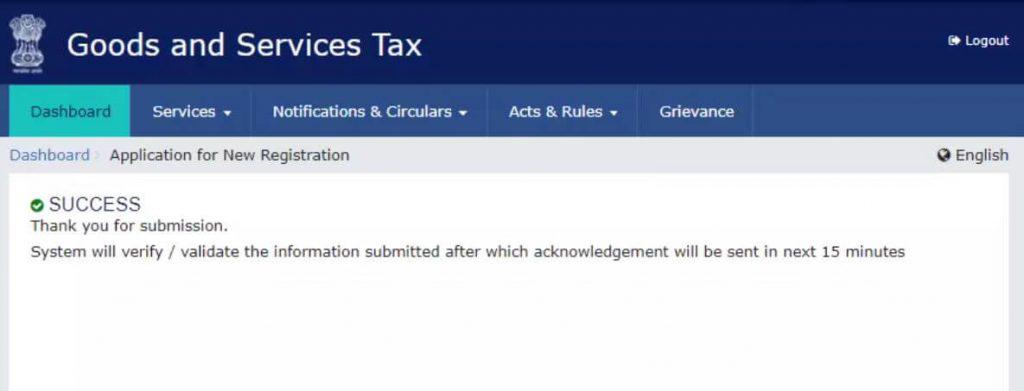
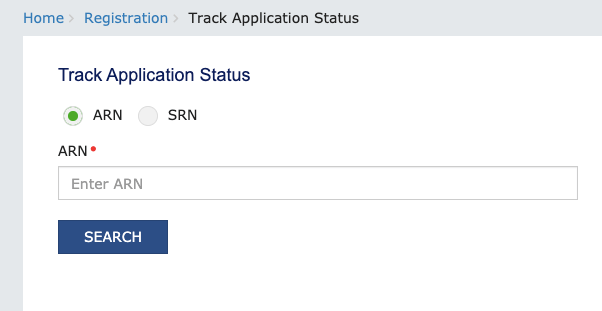
Step 11- Now you will see a success message, and there you will find your Application Reference Number (ARN) in your registered mobile number and email, from which you can check the status of your application.
You can check the status of your application in the GST portal by going to this link https://services.gst.gov.in/services/arnstatus and entering the ARN number.
Now you will understand how the online GST registration will be done, one more things you can use this GST Software for your reference. In last if you have still not understood anything, then you can ask us in the comment box given below.

